


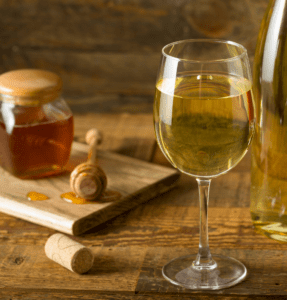
Spring Brewing Recipe: A Simple First Mead
Mead is one of the oldest fermented drinks in the world, and it’s also one of the simplest to make. At its most basic, mead is just honey, water, and yeast. That simplicity is one of the reasons it has become popular again with home fermenters. It can be made in small batches, it requires very little equipment, and it offers plenty of room to experiment with flavors later.
This recipe walks through a basic traditional mead. The goal is not to make something complicated, but to produce a clean fermentation that helps you understand how honey behaves during fermentation.
Equipment
Most brewers and winemakers already have what they need to make mead. For a small one-gallon batch you will typically need:
- Fermentation vessel (one-gallon jug or small fermenter)
- Airlock and stopper
- Hydrometer or refractometer
- Sanitizer (for example Star San or Iodophor)
- Large spoon or whisk
- Funnel
- Siphon or auto-siphon for transferring
- Bottles and caps or corks
Mead can also be made in larger fermenters if you want to scale up later.
Ingredients (1 gallon batch)
- 2.5 to 3 pounds honey
- Water to one gallon (preferably chlorine-free (see blog post on Chlorine and Chloramine)
- 1 packet wine or mead yeast (for example Lalvin D-47, EC-1118, or 71B)
- Yeast nutrient (like Fermaid, servomyces, et al .. optional but recommended)
Honey variety matters. Different honeys will produce different aromas and flavors, so part of the fun of meadmaking is experimenting with them.
Sanitation
Before starting, clean and sanitize all equipment that will touch the must or the finished mead. Sanitation is important because fermentation creates a nutrient-rich environment where unwanted microbes could grow. A quick rinse with a brewing sanitizer such as Star San or Iodophor greatly reduces that risk.
Mixing the Must
In meadmaking, the mixture of honey and water before fermentation is called must.
- Warm the honey container in a bowl of warm water if needed so it pours easily.
- Add the honey to your sanitized fermenter.
- Add warm (not hot) water until the fermenter is about three-quarters full.
- Stir or shake vigorously to dissolve the honey and introduce oxygen.
- Add additional water until you reach one gallon total volume.
Take a hydrometer reading if you want to track fermentation progress. Most traditional meads will start somewhere around 1.090–1.110 depending on how much honey is used.
Adding Yeast
Typical mead yeasts include D47 or 71B or EC-1118. Rehydrate or pitch the yeast according to the manufacturer’s instructions. Add the yeast to the fermenter, attach the airlock, and place the fermenter somewhere with a steady temperature around 60–70°F (16–21°C). Within a day or two you should begin to see signs of fermentation, including bubbles in the airlock and light foam forming on the surface.
Fermentation
Mead fermentation is slower than beer. Primary fermentation usually lasts two to four weeks, depending on yeast and temperature. During fermentation you may notice:
- bubbling in the airlock
- a layer of foam or particles rising and falling
- gradual clearing as fermentation slows
You can follow progress by taking hydrometer readings. When the gravity remains the same for several days and fermentation activity has stopped, the primary fermentation is complete. Many meadmakers then allow the mead to age and clear for another few weeks or months, which improves flavor and clarity.
Stabilizing the Mead
If you plan to sweeten the mead after fermentation, it is helpful to stabilize it first so fermentation does not restart. That is, fermentation stops when the yeast runs out of sugar to digest. If you add fruit or other fermentables back into your mead, it will cause the yeast to take off again, and the sweetness from the fruit you just added will be further fermented and lost to alcohol.
Stabilization is often done with potassium sorbate, sometimes used together with Campden tablets. Potassium sorbate does not stop an active fermentation, but it prevents yeast from reproducing again after fermentation has finished. This allows you to adjust sweetness without creating new fermentation in the bottle.
Back-Sweetening Options
Once fermentation has fully finished and the mead is stabilized, you can adjust the sweetness if desired. Common back-sweetening options include:
- adding more honey
- adding fruit juice or fruit puree
- adding spices such as vanilla or cinnamon
Always add small amounts and taste as you go. Honey will dissolve easily and can bring back some of the floral character that fermentation may have reduced.
Bottling and Storage
When the mead has cleared and the flavor is where you want it, it can be bottled.
- Siphon the mead carefully into sanitized bottles.
- Avoid splashing, which can introduce oxygen.
- Seal bottles with caps or corks.
Mead benefits from aging. Even a simple traditional mead often becomes smoother after two to six months in the bottle. Store bottles in a cool, dark place while they mature.
A Simple Starting Point
The beauty of mead is that this simple process is only the beginning. Once you have made a traditional mead, you can start experimenting with:
- fruit additions
- spices and herbs
- different honey varieties
- different yeast strains
Each batch teaches you a little more about how honey ferments. With time, those small experiments lead to more confident and creative meadmaking.
Mead is a great place to start fermenting .. it’s easy, but also very flexible and a great foundation on which to explore the art of fermenting.
Cheers!
Grain Honey Yeast SCOBYs Hops Nutrients Flavorings Fermenters Equipment Kits